How to configure a redirect using the IIS URL Rewrite module
What is the IIS URL Rewrite module?
The IIS URL Rewrite module is a tool used to convert complex web addresses into consistent, memorable, URL's. The rewrite module produces URLs which are simple for users to remember and for search engines to find.
The rewrite module is based on HTTP headers and IIS server variables. It performs redirects, sends custom responses, or stops HTTP requests based on the logic expressed in the rewrite rules. Access to web site content is controlled by URL segments or metadata.
More information on the IIS URL Rewrite module and its features can be found here.
Using the IIS URL Rewrite module for more security
The URL rewrite module can also be used to reduce information disclosure in IIS:
HTTP version 1.0 request to the server (for any URI) without the Host header set will cause the server to reveal its internal IP address.
This vulnerability is known as Client Access Server Information Disclosure. The issue applies to IIS after 6.0 and before 10.0. You can find more information in this external article: https://www.cyberis.co.uk/blog/cas_info_disclosure.html
- Open IIS Manager and click on your SquaredUp DSinstance.

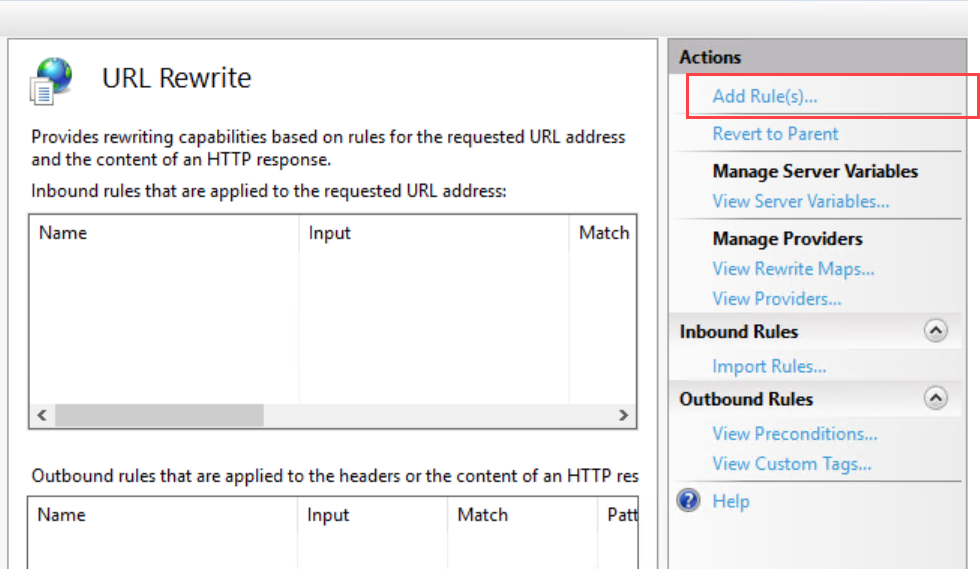
- In the main panel, double-click on URL Rewrite.

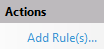
- Click on Add rule(s) in the Actions panel on the right hand side.
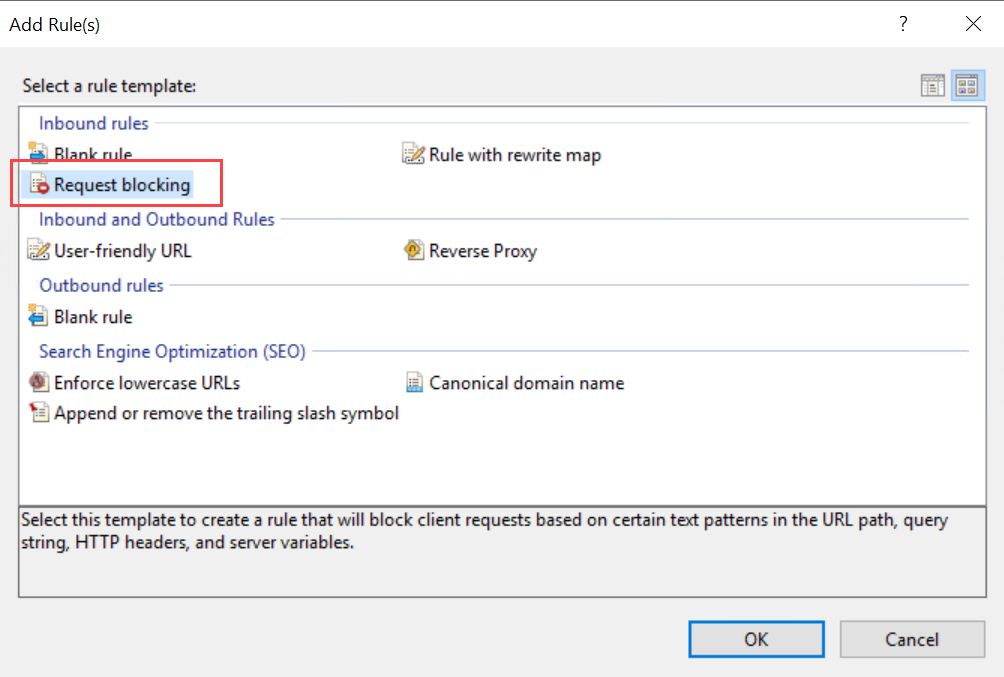
- Choose Inbound rules > Request blocking.
- Enter the following settings for the rule:
Block access based on: Host Header
Block request that: Does not match the pattern
Pattern (Host Header): .+
(read: "dot plus", meaning "match one or more of any characters")
Using: Regular Expressions
How to block: Abort request - Click OK to save the rule.
You can now see the rule in the URL rewrite module. Connections made via HTTP 1.0 without a Host header will now be rejected by the server.
There are 3 response headers you should remove for security reasons:
- Server - Specifies web server version
- X-Powered-By - Indicates that the website is "powered by ASP.NET."
- X-AspNet-Version - Specifies the version of ASP.NET used
Note: This method does not remove the header itself, but removes the value of it.
You can find other methods of removing the headers and more details about this security issue in this external article: https://techcommunity.microsoft.com/t5/iis-support-blog/remove-unwanted-http-response-headers/ba-p/369710
- Open IIS Manager and click on your SquaredUp DS instance.
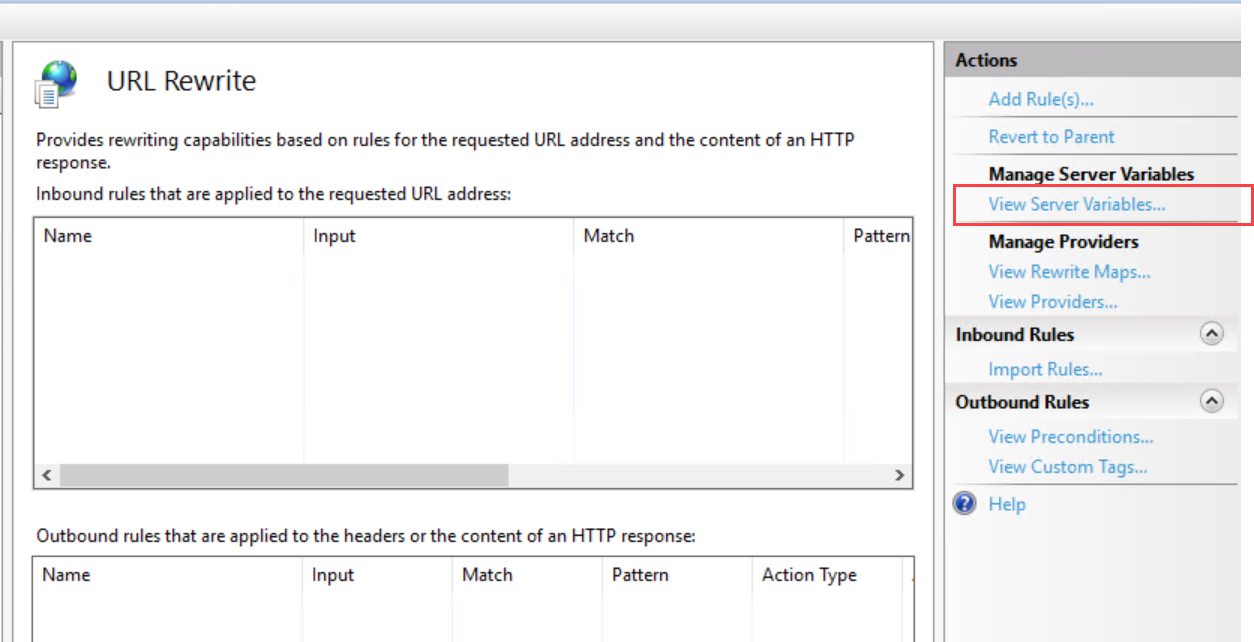
- In the main panel, double-click on URL Rewrite.
- Click on View Server Variables in the Actions panel on the right hand side.
- Click the Add button in the Actions panel.
- Add 3 new variables, one for each header you want to remove:
RESPONSE_SERVER for removing the Server header
RESPONSE_X-POWERED-BY for removing the X-Powered-By header
RESPONSE_X-ASPNET-VERSION for removing the X-AspNet-Version header
You can see the newly created server variables in the list of allowed variables.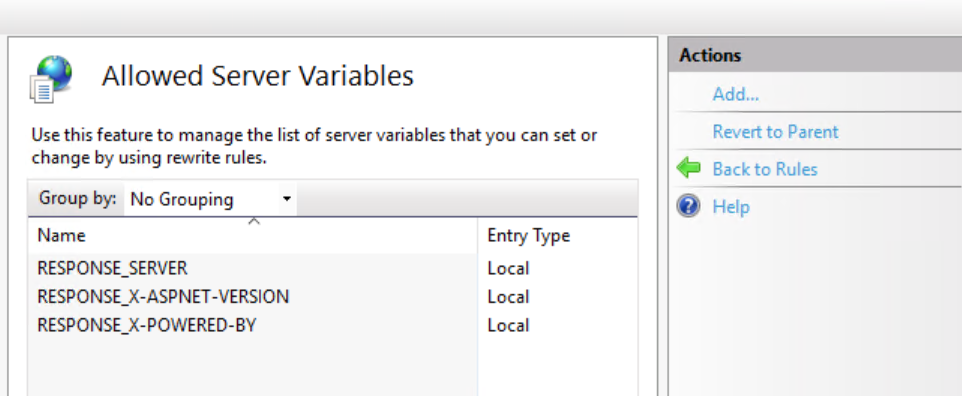
- Click the Back to rules button in the Actions panel.
- Click the Add rule(s) button in the Actions panel.
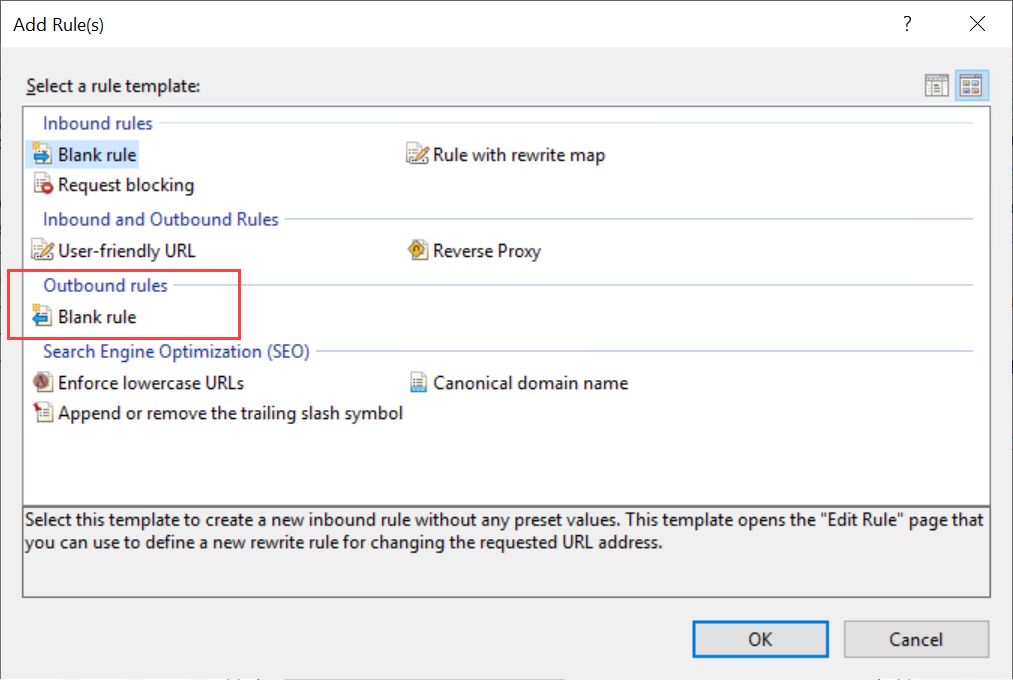
- Create 3 new rules, one for each header you want to remove. Choose Outbound rules > Blank rule for each rule.
- Enter the following settings for each rule:
Name: Give the rule a name, for example "Remove Server Header"
Precondition: None
Matching scope: Server Variable
Variable name: RESPONSE_SERVER
(use RESPONSE_X-POWERED-BY and RESPONSE_X-ASPNET-VERSION for your other two rules)
Variable value: Matches the pattern
Using: Regular Expressions
Pattern: .*
(read "dot asterisk", meaning "match any content")
Action type: Rewrite
Leave the other settings to default. - Click the Apply button in the Actions panel.
Prerequisites
- Ensure that you are using IIS 7 or above.
- The IIS URL Rewrite module is installed during the SquaredUp DS setup, if it not already installed. Alternatively, you can download IIS URL Rewrite module version 2 from Microsoft here. Close and re-open IIS to ensure that the IIS URL Rewrite module loads.
Instructions for configuring useful redirects
Configuring a redirect to switch traffic from the root to a SquaredUp DS instance
Configuring a redirect to switch traffic from HTTP to HTTPS
How to redirect Open Access dashboards following a side-by-side upgrade to v5
Configuring a redirect to switch traffic from the root to a SquaredUp DS instance
You can redirect traffic that goes to the root URL to go directly to your SquaredUp DS instance to make the URL shorter and easier to use. For example, instead of having to use https://mywebsite.com/squaredup, your users would just have to enter https://mywebsite.com to reach SquaredUp DS.
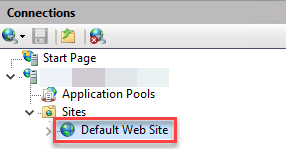
- Open IIS Manager and click on Default Website
- In the main panel, double-click on URL Rewrite.
- Click Add Rule(s)... on the right-hand menu.
- With Blank rule selected click OK.
- Give the rule a name, such as 'Root Hit Redirect'.
- In the Match URL section copy the following regex into the Pattern box:
^$
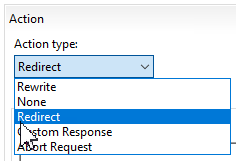
this asserts position at the start and end of the string entered. - In the Action section change the Action type from Rewrite to Redirect.
- Copy the following into the Redirect URL box:
/squaredup
wheresquaredupis the application name of your SquaredUp DS instance from your URL.If you used the downloadable installer:
By default, the URL to your SquaredUp DS instance is:
http://SquaredUpServer/SquaredUpInstanceSquaredUpServeris the name of the server where SquaredUp DS is installed.By default,
SquaredUpInstanceisSquaredUp. For v5 it isSquaredUpv5. If you gave your SquaredUp DS instance a different application name when you installed it, use the name you chose.On the server it would be
http://localhost/SquaredUpIf you deployed SquaredUp DS from the Azure Marketplace:
The URL is
https://DNSNameof the virtual machine (VM) deployed. - Change the Redirect type from Permanent (301) to Found (302). We recommend the use of a 302 temporary redirect. Do NOT use 301 which is a permanent redirect and difficult to change at a later date.
- Ensure Append query string is ticked. This is will add either
/SquaredUpto the URL and redirect the user to their dashboard. - The Inbound Rule should look like this:
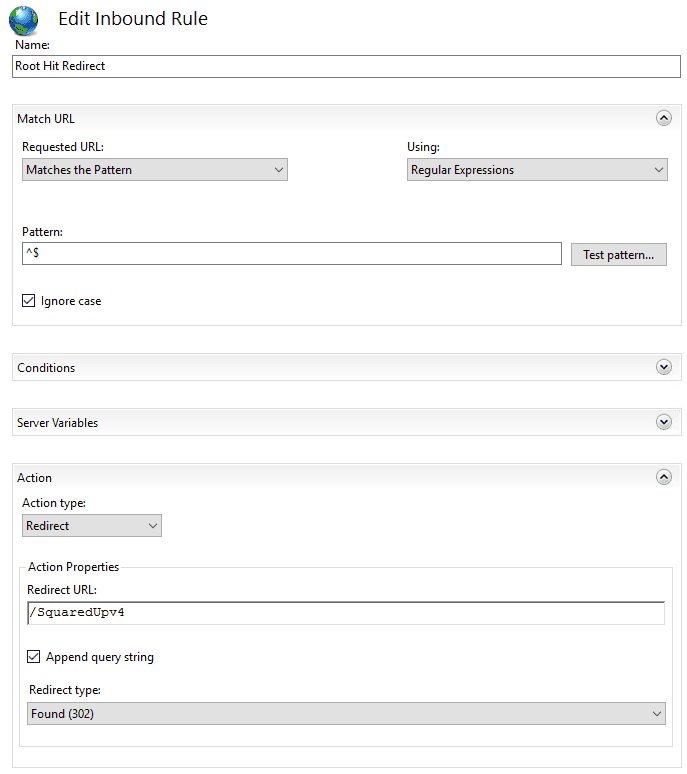
- Click Apply on the right-hand menu under Actions.
Configuring a redirect to switch traffic from HTTP to HTTPS
For more information about SSL/TLS and HTTPS see How to configure TLS/SSL (HTTPS)
To redirect all HTTP requests to HTTPS use the following steps:
- Open IIS Manager and click on the website that hosts the SquaredUp DS instance (this is normally Default Web Site).
- In the main panel, double-click on URL Rewrite.
- Click Add Rule(s)... on the right-hand menu.
- With Blank rule selected click OK.
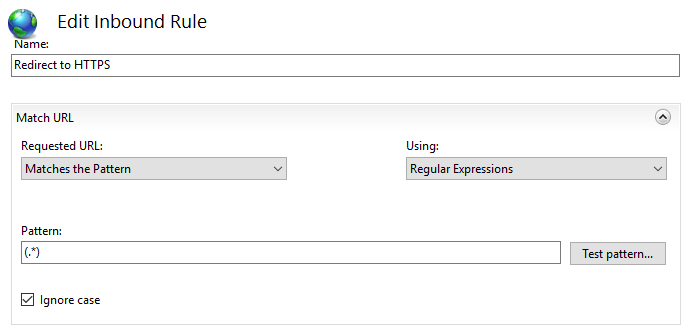
- Give the rule a name, such as 'Redirect to HTTPS'.
- Copy the following and paste into the Pattern box in the Match URL section:
(.*)
- Click to expand the Conditions section.
- Click Add… to add a new condition to the configuration.
- Copy the following and paste into the Condition input box :
{HTTPS} - Copy the following and paste into the the Pattern box:
^OFF$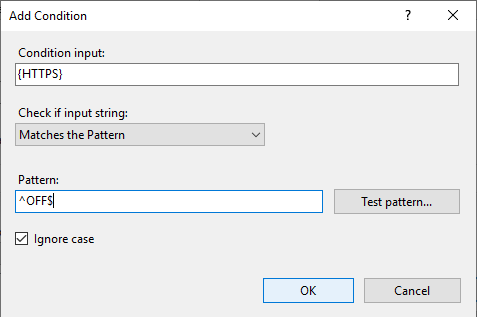
- Click OK.
- Scroll down and in the Action section
- In the Action section change the Action type from Rewrite to Redirect.
- Copy the following and paste into the Redirect URL box:
https://{HTTP_HOST}/{R:1} - Change the Redirect type from Permanent (301) to See Other (303).
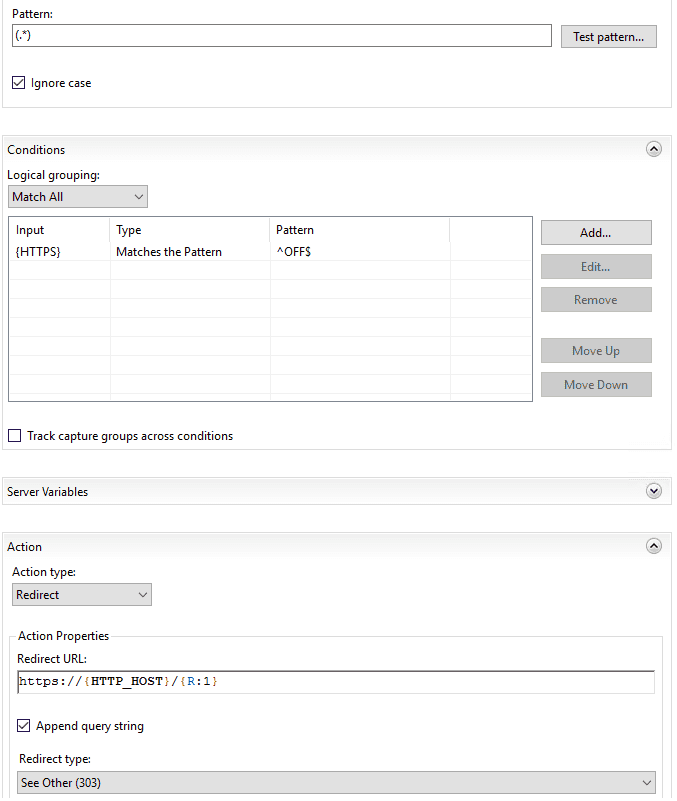
- Click Apply on the right-hand menu under Actions.
- Click Back to Rules.
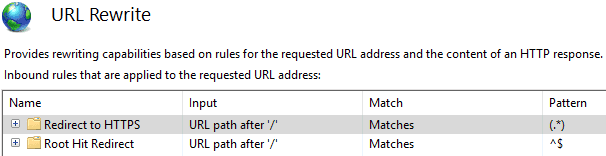
- If you have other redirects configured you should ensure that you move your Redirect to HTTPS redirect to be listed first as shown in the image below. You can do this using the Move Up and Move Down options on the right.
How to redirect Open Access dashboards following a side-by-side upgrade to v5
When you run SquaredUp DS v4 and v5 side-by-side, you can redirect your v4 Open Access links to the v5 Open Access dashboards. This way, users can get the benefits of Open Access on v5, such as the ability to hover over data to get more information.
This redirect only works as long as the v4 application pool is running and SquaredUp DS v4 is installed. If you remove SquaredUp DS v4 version, you need to use the new v5 links to access the dashboards.
When upgrading from SquaredUp DS v4 to v5 the Open Access dashboard IDs remain the same, which is why you can redirect the old v4 Open Access URLs to the new v5 Open Access URLs using the IIS URL Rewrite module .
Configuring a redirect to switch traffic from v4 to v5 Open Access dashboards
These instructions apply to the default installation configuration where SquaredUp DS is installed to an application underneath a website. If you have a different configuration please contact SquaredUp Support
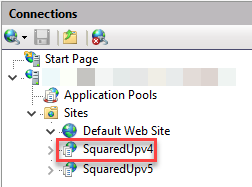
- Open IIS Manager and click on the SquaredUpv4 application (you may have used a different name at installation).
- In the main panel, double-click on URL Rewrite.
- Click Add Rule(s)... on the right-hand menu.
- With Blank rule selected click OK.
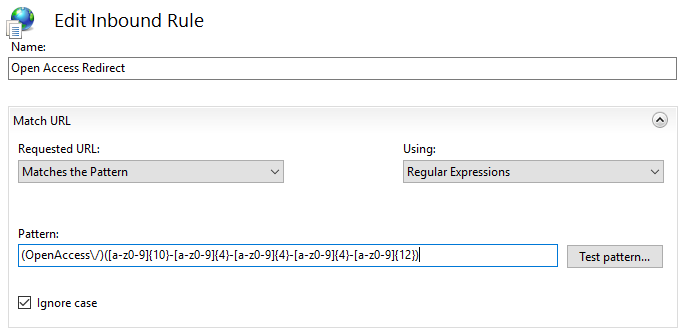
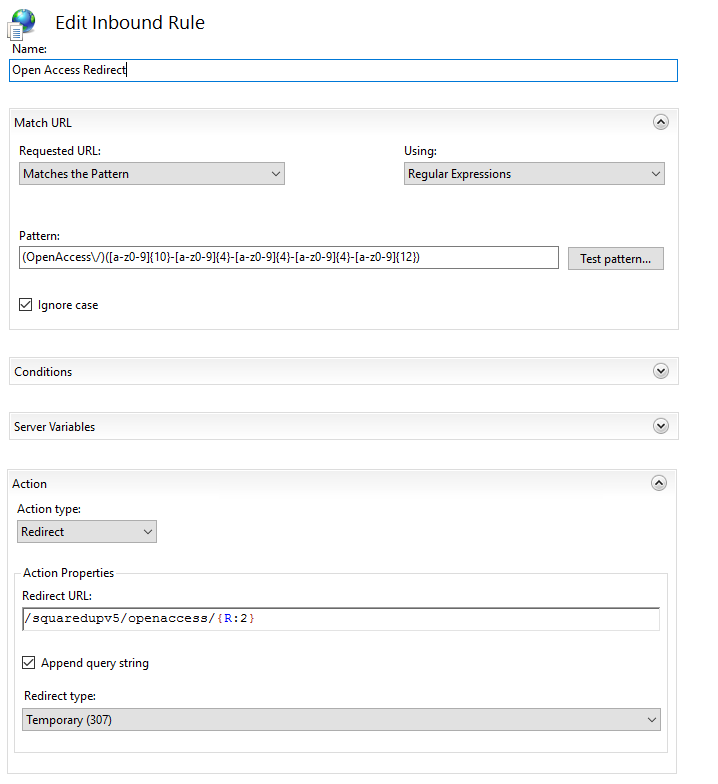
- Give the rule a name, such as 'Open Access Redirect'.
- In the Match URL section copy the following regex into the Pattern box:
(OpenAccess\/)([a-z0-9]{10}-[a-z0-9]{4}-[a-z0-9]{4}-[a-z0-9]{4}-[a-z0-9]{12}) - The regex Pattern value matches the OpenAccess/[Open Access ID GUID] call that is made by the browser when first opening an Open Access dashboard.
- In the Action section change the Action type from Rewrite to Redirect.
- Copy the following into the Redirect URL box:
/squaredup/openaccess/{R:2} /squaredup/openaccess/{R:2}
wheresquaredupis the application name of your instance.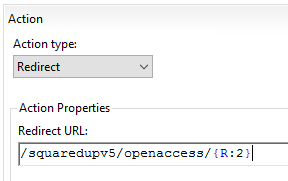
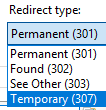
- Change the Redirect type from Permanent (301) to Temporary (307). A Temporary redirect is preferred as it doesn't allow the HTTP Method to be changed as part of the redirect, and it is well supported by different browsers.
- The Inbound Rule should look like this: Pattern: (OpenAccess\/)([a-z0-9]{10}-[a-z0-9]{4}-[a-z0-9]{4}-[a-z0-9]{4}-[a-z0-9]{12}) Action Type: Redirect Redirect URL: /squaredup/openaccess/{R:2} Redirect type: Temporary (307)
- Click Apply on the right-hand menu under Actions.
- With the redirect rule now in place. To updates wallboards to show the v5 Open Access dashboards the page should be manually refreshed, or the wallboard rebooted if that is easier. Any old Open Access links that have been emailed or saved should redirect when they are clicked.
The redirect will no longer work when the v4 application pool is stopped, or SquaredUp DS v4 is removed.